Forum Replies Created

Page 8 of 112
  • Graham Quince

    March 1, 2024 at 4:44 pm in reply to: Please can anyone help me achieve this effect?

    It is possible there is a preset or particle emitter for that, but I think the simplest approach would be to animate a layer performing the animation you want, then duplicate the layer, move it forwards in time, the with it selected, hold the ALT key and drag new footage onto the layer.

    And then repeat for all the layers. It’s a little bit of work, but it will get you what you’re after.

  • Does the same thing happen with PNG sequences?

    And if you drop your TIF sequence into Media Encoder, do you get the same problem?

  • Graham Quince

    March 1, 2024 at 4:31 pm in reply to: stardust angle random keyframe wont work

    I don’t have stardust, but in my experience particle emitters all work by applying parameters at the time of creation. I’m making some assumptions here, but if you’re not seeing a change with your keyframes, could it be that all particles are generated at the start?

  • Graham Quince

    February 17, 2024 at 10:34 am in reply to: Kuwahara Filter for After Effects

    Just Googled “Kuwahara Filter” and it looks quite like the Brush Strokes effect in AE. I’m sure newer filters do a lot more, but as a starting point it would be worth trying before spending money.

  • How are you importing the 3D model of the helmet? Is it an OBJ file or GLB file, and you’re using the new AE 3D import? Or are you using Video Copilot Element3D or HeliumX’s Helium, or are you importing into C4D Lite?

    In all cases, you need to alter the texture being used for the helmet. With luck there is a separate image file alongside the 3D model and you will alter this in software like Photoshop.

    If there is no 3D file, it’s likely the textures are procedural and it gets a little trickier as the solution will depend on the model type and how you’re importing it.

  • Graham Quince

    February 10, 2024 at 4:37 pm in reply to: Rounding Offset strokes for shape Merge.

    I’m really not sure about the second issue you’re having, but the trim effect and the shape strokes is a common issue. I’ve found the simplest solution is to use two layers with one set as the alpha matte for the other. This should allow you to grow / shrink the paths.

    In terms of why some are rounded and straight, that feels like it might be the Line Cap options chosen, but it’s difficult to know without seeing your timeline.

  • Graham Quince

    February 9, 2024 at 11:40 am in reply to: Shape layers in 3D (in after effects)

    I think I’d use the include script Create Nulls from Path. And choose Points follow nulls. This will give you easy to adjust points (you can make the nulls 3D objects too).

    Ultimately it’s a 2D effect being faked in 3D, so you might be forced to switch to a 3D stroke. There is a plugin called 3D stroke, I think) or you could try with splines in C4D.

  • Graham Quince

    January 12, 2024 at 3:12 pm in reply to: “Crop Comp to Region of Interest” but for Solids?

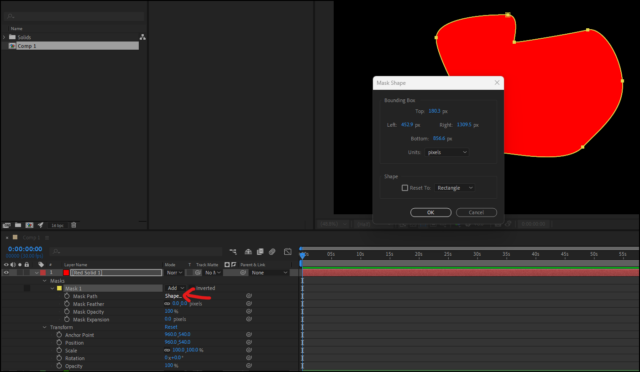
    So I just spent some time on https://ae-scripting.docsforadobe.dev/ and even tried with ChatGPT, but it looks like scripts cannot access a mask’s bounding box information. Although even if they could, you’d then have to resize the mask once you’d shrunk the layer (which you can do quickly by copying the mask to your clipboard, resizing the layer and then pasting it back on)

    I’ve built some complex set ups using many layers myself and can understand your pain about render times increasing. Best i can suggest is if you truly do have so many layers than each solid size is having a cumulative impact, maybe explore either CC Particle World or one of the pay-for particle plugins. The third party ones might be able to pull some tricks with the GPU to speed up the process.

    The other suggestion i have is render out the layers as an image sequence. Granted this only works if the layers are there as scene decoration, but if this is the case, you should be able to reduce how much you’re taxing the software.

  • So the “horns” are on a separate layer? And you want them to follow the head as it bends to one side? In which case, the simplest option is to line up keyframes. Set rotation keyframes for the other layer at the start, then hold down SHIFT and scrub the timeline and the time indicator will snap to the next keyframe (or use the arrow keyframes on the top layer to do the same).

    If you don’t like that option, then you’ll need to use the linear expression to map the puppet pin positions onto rotation values. More work to get right, but would then allow for a lot of animation.

  • Can you post a still so we can get an idea of what you’re starting with? It would help me to have something to try out before posting a solution.

Page 8 of 112

We use anonymous cookies to give you the best experience we can.
Our Privacy policy | GDPR Policy