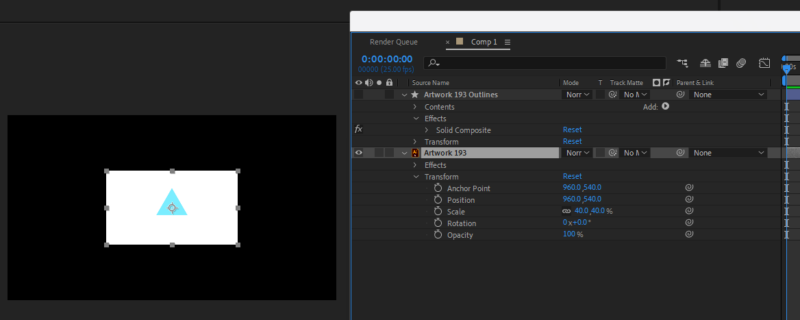
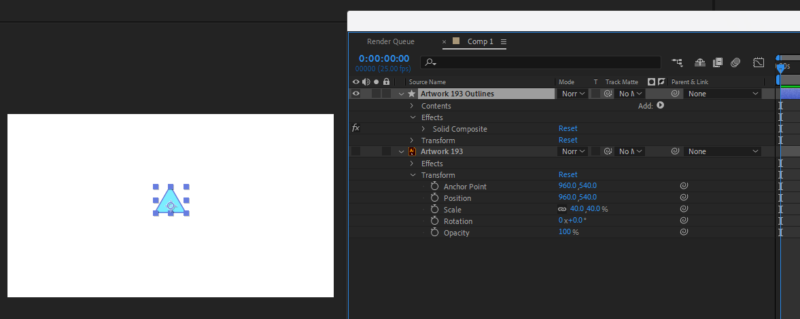
Regards the solid composite effect, I see why you thought this, but note the difference in my attached screenshots.
When you drag in a non-native file such as an Illustrator project file or Photoshop file, the layer size (grey squares on the corners) is limited to the file dimensions, this is effectively being interpreted like a raster image that has been imported. An effect like the solid composite will fill in the whole layer background, but the layer dimensions are being restricted.
If you convert that AI file into into a native After Effects object like I’ve done in the top layer on the screenshots, this will become native vector layer that doesn’t have layer bounds. Now when you click on it, you’ll see the object bounds (blue squares on the corners), but the layer background is essentially covering the entire composition now. This holds true for all vector shapes in After Effects. In the same way the outer glow won’t be affected by the bounds for layer shapes.
The reason you’re not seeing the Outer Glow is because this is a layer style, which sits below Effects on the hierachy. So After Effects is first adding an outer glow, then adding a composite solid on top of the outer glow, then showing the shape on top of that. If you disable the Solid Composite, you should see your glow appear.
You can either turn off solid composite and just add a background solid color below the shape layer, or you can try using the Stylize > Glow effect and ensure it is above the Solid Composite effect.
Layer order matters everywhere in After Effects – parents, sublayers, groups, effects, masks, precomps – all layers are rendered from the bottom upwards – so the highest layer is in front of all the other layers.