Forum Replies Created

Page 15 of 36
  • Hector Vera

    April 10, 2024 at 8:27 pm in reply to: SpeedGrade 2015 keyframe issue

    Never have used this program before but in my experience with other older versions of an application like this, they usually do not provide a legit way to upgrade from an old outdated version to a new one directly and if so, it may have some glitch and bugs from old outdated files that could be preventing it from working like it should. Usually in this case, I would just find the latest version of this application from an official source and install it that way so its a lot more likely to have all the features working. You can also try uninstalling and reinstalling the application if something is broken cause it could be a broken .dll file or some files needed to run features of an application in general. Good luck! 🙂

  • In order for you to change the opacity on the front of a 3D Shape, you can apply the layer mask technique to pull it off. Here are the instructions I found online that should be able to help you on this:

    1. Bring your 3D shape layer into your composition and select the layer.
    2. Add a new adjustment layer above the shape layer. Right-click on the adjustment layer and select “Create Null Object” to add a null object.
    3. Click on the new null object and add a “Trim Path” effect to the null object. This will allow you to create a path for the 3D shape to follow.
    4. With the Trim Path effect selected, click on the stop watch icon next to the “Start” property. This will add a keyframe for the start of the path.
    5. Move forward in the timeline a few frames and create a new keyframe for the end of the path. Drag the path to create a path that goes around the 3D shape.
    6. Right-click on the adjustment layer and select “Create Track Matte”.
    7. In the Track Matte options dialog box, choose “Alpha” as the matte type. Click OK. This will create an alpha matte for the adjustment layer.
    8. With the adjustment layer selected, click on the “Opacity” property. By default, it will say “Visible”. Change this to “Invert Matte” and click the stop watch icon to add a keyframe.
    9. Move to the frame that you want to apply the opacity effect. Change the opacity to your desired level.

    If all this is followed correctly, the results should be a 3D Shape with both a transparent front and solid sides. You can repeat this technique several times in order to change the opacity of all sides and you can also make other kinds of alterations to the 3D Layers to make it more close to the results that you want. I hope it helps!

  • Hector Vera

    April 10, 2024 at 8:03 pm in reply to: Linear wipe + wiggle

    Indeed it is possible to apply a Wriggle to a linear wipe that already is within the keyframes. This is what I found after doing some research! Follow these steps in order to do this:

    1. Apply the “Wiggle” effect to the layer that contains the linear wipe.
    2. In the “Wiggle” effect’s properties, you can adjust the “Amplitude” and “Frequency” parameters to your desired level of wiggle.
    3. Adjust the “Phase” parameter to determine at what point in the animation the wiggle should start. This will determine the timing of the wiggle.
    4. You can also adjust the “Random Seed” parameter to control which parts of the animation the wiggle effect will affect.
    5. Preview the animation to see how the wiggle is affecting the linear wipe.
    6. Adjust the parameters as needed to get the desired effect.

    I really hope this helps, any questions, feel free to ask to see if you need further help!

  • Hector Vera

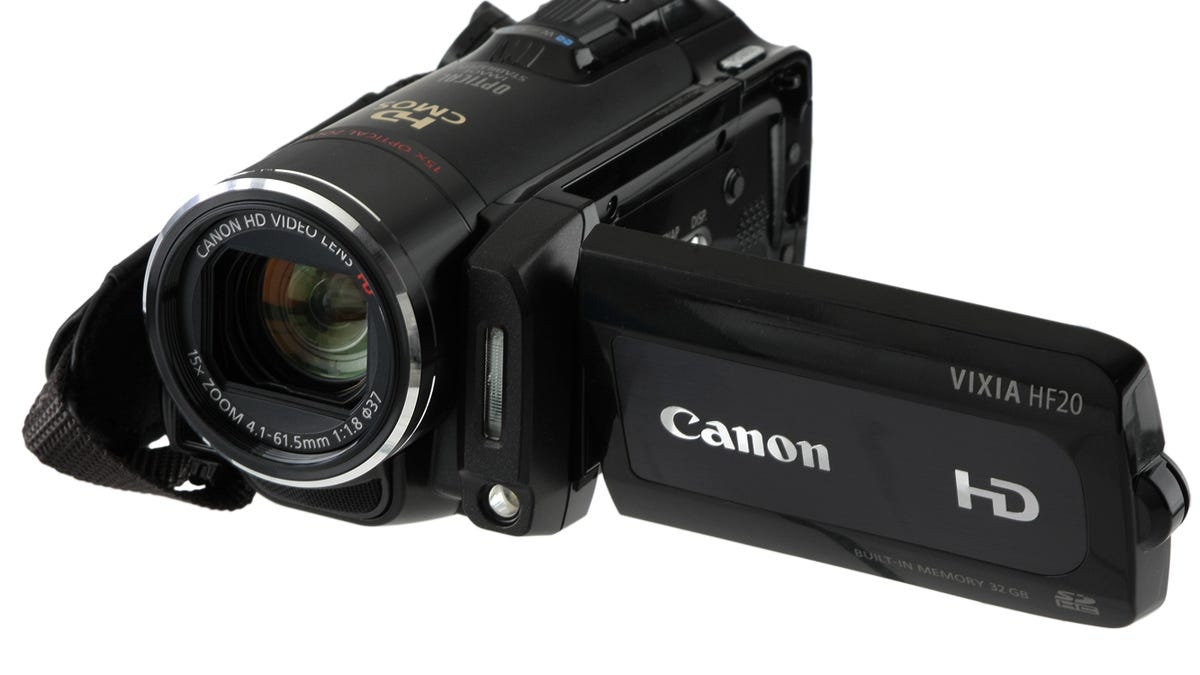
    April 9, 2024 at 12:38 am in reply to: Canon Vixia HF20 Firmware

    Seems you had the older version of this camera than what I have. The one that I have is the Canon VIXIA HF R500 which came out around 2014 and your HF20 is a 2009 model it seems according to this link: https://www.cnet.com/reviews/canon-vixia-hf20-review/

    And even my own HF R500, Canon does not have firmwares there and nor is the other one.

    Seems finding the firmware software online may pose a challenge since Canon was the one who took down these firmware from the main page.

    Someone else on Reddit did answered this question as well a couple of years ago, maybe this can lead somewhere: http://www.reddit.com/r/canon/comments/scy06n/vixia_hf20_firmware/ Hope it helps and let me know how it goes.

  • Hello! I found a couple of sources on YouTube that seems to be decent in explaining on how to import SVG icons to After Effects, there seems to be a couple of ways around it, seems it cannot be imported directly from the shorts I see. Here are the 2 sources you can use:

    https://www.youtube.com/watch?v=KyLtb_1dwwA

    The Short: https://www.youtube.com/watch?v=ru7UDDAmhuM

    Hope it helps you in some ways and best of luck! 🙂

    Some contents or functionalities here are not available due to your cookie preferences!

    This happens because the functionality/content marked as “Google Youtube” uses cookies that you choosed to keep disabled. In order to view this content or use this functionality, please enable cookies: click here to open your cookie preferences.

  • Hector Vera

    April 3, 2024 at 2:11 pm in reply to: Video much brighter after upgrading

    No problem, and glad at least you made some progress with your work! 🙂

  • It seems that you are facing an issue where the stroke of the animation does not match the path being followed by the nulls. This can be caused by a few things, including:

    1. The path is not closed properly, which can cause weird behavior with the stroke.
    2. The animation is scaled in some way, which can affect the way the stroke is rendered.
    3. The nulls are not correctly positioned along the path.

    To troubleshoot the issue, the client can try these steps:

    1. Make sure the path is closed properly. A closed path means that it forms a complete shape. If the path is not closed, it will have a start and end point, which can cause issues with the stroke.
    2. Check the scale of the animation and make sure it is not affecting the stroke. If the scale is not uniform, this can cause the stroke to be stretched or compressed in strange ways.
    3. Make sure the nulls are positioned correctly along the path. If the nulls are not positioned correctly, they may not be aligned with the path, which can cause the stroke to be off-center or not follow the path properly.

    I hope this helps! Let me know if you have any further questions just incase. Good luck!

  • Hector Vera

    April 2, 2024 at 7:08 pm in reply to: Video much brighter after upgrading

    Hello Daniel! Here is an explanation I found online and hope that it helps:

    One possible explanation is that the default settings for gamma and color management may have changed with the update to the new version of Premiere. This could result in a brighter, more washed-out look.

    You can try adjusting the gamma and color settings in Premiere to improve the look of the footage. The steps can vary depending on the version of Premiere you are using, but typically you can find these settings under the “Project” settings menu. Look for the “Color Management” and “Gamma” settings, and play around with changing the default values until you find a look that you prefer.

    Another possibility is that the new version of Premiere is using a different rendering engine or different encoding settings than the old version. If the two systems are not set up identically, there could be differences in the way the footage is being rendered. One way to troubleshoot this is to compare the encoding settings between the two systems and make sure they are the same.

    If none of these solutions work, you may need to contact Adobe support for further assistance. Good luck!

  • Hector Vera

    April 1, 2024 at 3:52 pm in reply to: OT: Photo Printer Recommendation

    No problem and sorry for the late reply!

  • Hector Vera

    April 1, 2024 at 3:51 pm in reply to: Tracking + Remove troubles

    Found this answer that can help you on this, hope this helps! 🙂 Good luck!

Page 15 of 36

We use anonymous cookies to give you the best experience we can.
Our Privacy policy | GDPR Policy