
Josh Crews
Forum Replies Created
-

From my experience, it’s simply a case of Quicktime missing the proper codec to open the clip.
I got the same error message in AE. I tried to open the problematic .mov files in Quicktime, to see that Quicktime was missing the codec I needed. FYI, you can always do an command i to get info inside of Quicktime to see what the compressor is, then use Google to search and download it.
Simple fix. Hope that helps.
-
I’ve come to same conclusion Jason. Seems that any rectangle, rounded rectangle, ellipse, polygon, or star tools that are drawn into shape layers do not have the option to edit the points. You can only do a free transformation with the bounding box. You need a custom path to edit points.
You can however paste paths from either mask layers or from Illustrator. You can either draw a random shape shape with pen tool to create shape layer, or do a Layer-New-New shape layer, then open the layer options and click add-path. Once that path is created, you can open the path options, where the actual path attribute lives. Click that path attribute (one with stopwatch beside) and pate your coped path here.
Lots of unnecessary steps for this, but hopefully Adobe fixes that in the next version. -
I’m having the problem, but can’t find a solution.
-
Where is the effects setting?
Thanks again. -
This is a great post. Exactly what I’ve been searching for all morning.
It is missing one important step though. He says that you need to enable the depth post effect in order to achieve depth of field. He bypasses how to enable it.
Does anyone know how?
Thanks again Creative Cow for saving the day.Josh
-
I’m glad I found this post. I’ve been researching crazy for ways to animate text like this.
Randy, you’re a genius. Animate the gradient on the alpha channel. Why didn’t I think of that?
Thank you. -
Man, that did it!! Nice one Adam. You have no idea how much you helped me. Thank you so much!!!
-
Wow. Actually that fixed the problem I was having with the refraction, because the spheres were the same size.
And using one sphere with 2 materials was a great suggestion as well. It’s working much better, and much easier to work with.
I’m very close to getting it now.
The only problem left is that I still cannot get my transparency dark and my colors vibrant at the same time.
Here’s where I’m at:This is globe with transparency and with no color, everything is good here:

When I add color, notice how the countries on the back of the globe are no longer as dark:
Just to clarify, I have one sphere, I have a material with alpha applied to it for the countries, and another material applied for the globe that has color, transparency, and reflection.
Here’s what I’m trying to recreate:

I can’t seem to get the same glossiness/reflectivity and bands of color like this.
Thank you so much for you help Adam. You’re a life saver. -
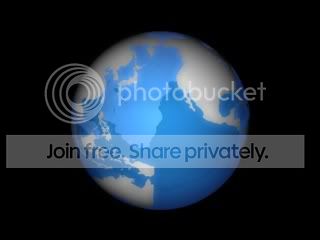
Ok. Here’s the glassy looking globe I’m trying to recreate in C4D.

Here’s what mine is looking like now:

I’ve pretty much got the colors down now, which I solved by adding a 3rd layer, a 3rd sphere. Anyway, what I can’t though is the refractive/glass/shiny look.
When I turn the refraction up, in the transparency tab in material editor, this is all i get:

Just a noisy version of what I had before.
Thanks,
Josh
-
Hi Adam. Thanks for the response. I’m using R11.
As far as the transparency issue. I’m still struggling getting the look I need.
I think I’m confusing myself trying to do this because I’m been attempting to do it for days now. Shouldn’t be this hard.
To get the look of the first globe (https://www.pointcproductions.com/exampleglobe.jpg), would you use one sphere to do that or two?
I’m still not getting the colors and the transparency to work right together.
What would be your work flow, as far as materials, to get that glassy/transparent look, as well with the map and color to it?