Mark Suszko
 12
Apple Final Cut Pro X Coins
12
Apple Final Cut Pro X Coins
 15
COW Coins
15
COW Coins
 2
Premiere Pro Coins
2
Premiere Pro Coins
 4
Apple Motion Coins
4
Apple Motion Coins
Forum Replies Created
-

All i can say is, we have a client that uses OBS sometimes and it is nothing but a hassle, lots of hiccups and freezes and crashes, and that’s on one shot, not a group of them. I’m thus not a fan. I suppose a lot depends on the specific hosting PC and the quality of net connection.
-
Your question is like asking what car to buy, when I don’t know if you need something to make grocery runs, go off-road, pull a house trailer, impress the low-rider club, or run fast on the autobahn.
Can you tell us what kinds of things you want to shoot? Then people can start giving your targeted advice that’s useful to you. Be as specific as you can, and list the most extreme limits of what you’d like to do.
How much shooting will be indoor, vs. outdoor? Will you need a lot of interchangeable lenses? Shooting in low or available-only light, or will you be lighting the shots? Are you mostly shooting closeup youtube blogger stuff at a desk, or going out in the world? Are you wanting to shoot things that take a lot of time, requiring long recording times and long battery life, or very short events? Do you need it to be lightweight and agile, hand-held most of the time, or will you be on a tripod most of the time? Are you shooting yourself mostly, or others? Musicians, or sports activity? Or stop-motion animation and time-lapse? What are your audio needs going to be? Does the camera need to match the qualities of some other camera very closely? Does the camera or at least, the lens, require stabilization, and do you prefer mechanical or digital stabilization? Does the camera need to be rugged and weather-resistant, waterproof or water-resistant? Will you be operating in cold and snow environments like skiing and snowboarding or nature photography? Do you need super-telephoto lenses, or wide-angles? Or some kind of middle-ground? Do you plan to do delicate camera moves and zooms? Are you the kind of person that will enjoy tweaking every manual setting, or would you rather the camera be as automated and easy/fast to use as possible?
-
Mark Suszko
November 16, 2020 at 3:29 pm in reply to: Achieving a Dim Look with Proper Exposure and Little NoiseWell, this is what I see in your “dim” shots;
The contrast ratio you’re used to seeing in conventional shots is reversed, so that the background is much brighter than the subject.
Background is washed or detailed with blue lighting, which traditionally suggests night.
Depth of field is kept short so the background detail is blurrier.
Subject’s key light is “reversed”; that is, instead of the key light coming in from the traditional same side as the camera lens, it is bounced off the opposite, far side of the face and body. This gives a rim light to outline the overall head and body, giving separation, dimension, and a sense of depth to the shot, and makes for interesting planes of brightness in the face, that help define shape of the face and head, but without brightening the overall head shot.
On a semiotic or psychological level, reversed keys can wordlessly communicate a lot about the environment and emotional state of the subject: reversed keys can suggest an unplanned, spontaneous and “natural” setting, one lacking artifice or grace, where what’s happening is unstructured and anything could happen. That’s why it’s good for bar scenes. It’s good for early morning/dawn/ getting out of bed shots, waiting in the dark “noir” type shots, It can suggest a candid situation, a private, unguarded moment, and intimacy. Read up on “Chiaroscuro“ lighting. On the face of an actor, it’s good for playing-up emotional scenes, grief, fear, anger, toughness, sudden realization or the reaching of conviction, scenes of characters contemplating big things, scenes that are the calm before the storm of incipient action, scenes where something is pondered and decided. The actor can “work” this lighting, turning their face into the light to, say, signify a positive choice, facing into their future, or, turning further away from the side-lighting, facing into the darkness more, retreating, to choose a darker path.
Stuff like this is what a DP and Gaffer think about all day; how to light something to help the actor, the director, the camera op, the editor and set designer, all to wordlessly communicate, in a split second, a whole bunch of context and back-story and emotional state, just by the lighting. They are communicating the script with photons instead of words. The lighting serves the same role as a musical score, telegraphing information on an unconscious level.
It’s also a hard-edged reverse key I see, with little or no diffusion, so perhaps it’s an open-faced scoop or panel, or fresnel lens instrument set to a hard edge, and tightly controlled with barn door flaps and other modifiers to limit spill or raising overall level. There is a little fill light on the camera side, but it is probably just a bounce card picking up and returning fragments of the reversed key light on the unlit side. That’s what I’d try first, if lighting this way.
As to post, well, everybody these days seem to be fascinated with LUTs: “Look-Up-Tables”. Think of them as filters applied to the footage that specifically accentuate some aspects and downplay others. People sometimes buy and collect these like pogs or pokemon cards or whatever, and tend to just apply them to everything for instant gratification – especially the infamous teal/orange combo. In your bar scene, the LUT will help push the contrast ratios and adjust mid tones without making it grainier. I think it’s kind of cliche’, myself, and instead of just slapping a LUT on the footage, I’d rather take the time to adjust the grade by hand and eye as I go along. Still, LUTs are definite time-savers and can be a good starting place for further customization. If you really don’t yet know what you are doing, you can quickly try a bunch of LUTs to get in the ballpark of the look you’re after. Then I urge further experimentation to make the shot more your own. LUT’s are not magic and they can’t fix everything that was done wrong on the original shot. An old photog friend of mine used to say “Photoshop is for people that can’t get it right in-camera.” That’s perhaps a little extreme, but he had the general idea right. Work as hard as you can in lighting it right, while on location, then use tricks like LUTs and Power Windows in post to take it the last 10 percent of the way.
-
Mark Suszko
November 16, 2020 at 2:59 pm in reply to: Green green subject shrinking/growing post editSelect both tracks and make it a compound clip. Then any scaling or re-positioning you do acts globally. To take the shot to the next level, though, you will want to simulate the focus changes when depth-of-field is short. In wide shots, the background is relatively sharp. In the re-cropped tighter shots, that backdrop should get some extra blurriness; use the gaussian blur filter on it as you also scale it up independently. This should be a subtle difference, but it markedly improves the illusion of a real world camera move.
-
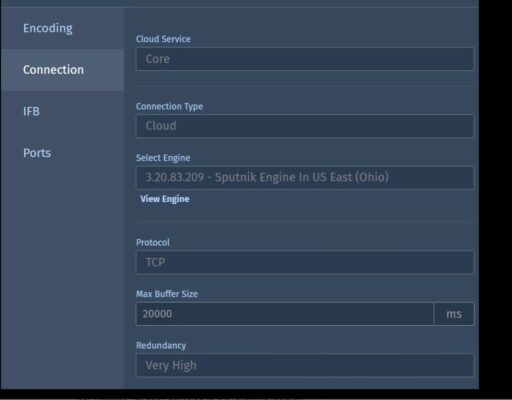
This is what my engineer gave me; don’t know if it helps – heck, all I know is how to turn the thing on; the rest is just voodoo… 😉

-
Mark Suszko
November 13, 2020 at 9:39 pm in reply to: Need Advice: Client wants to shoot remotely on his laptopOn top of Steve’s good advice, I’d suggest you add a second b-roll/cut-away camera, which could be the guy’s iPhone or Android, on some kind of stand or tripod. The local Five Below store has, like, eight different designs for these right now, for example, or you can get it off Amazon, etc. or even make a cel phone tripod out of any random cardboard box in 60 seconds, (I call it the “box pod”: you cut two horizontal slits across one corner of a cardboard box, set apart the same distance as the width of the phone, press into the box to collapse the corner inwards, instant phone holder)
The thing consumers might not know is that the selfie cam on a smartphone is often of lower resolution or quality than the camera on the non-screen side of the phone, so if anybody at the demo guy’s home can be drafted to line up the phone shot for him and press the “go” button, you end up with a better cut-away shot for the product shots. All the better NLE’s now can automatically synch multiple cameras by their audio, so you can edit something that is visually much more interesting and professional-looking to watch.
Just because it’s web video, shouldn’t mean we have to give up the good things we’ve developed in shooting broadcast video, like lighting, sound, and camera shots. We just have to get creative on how to obtain them in different ways. Spend the time to coach the client on lighting, backgrounds, and sound. Lighting can often be greatly enhanced with a simple bounce card of foam board or poster board from the local store, for example. Leverage your craft wherever you can; it need not be expensive to look good.
-
I like the other fellas’ answers better than my own, but thought I’d mention two things.
Bonded cellular, like Teradek Bond, DeJero, Mushroom Networks, or Live View. Sends your video into the cel network, bring it back down via an internet connection at the control room, and it also can simultaneously record in the cloud. The cloud recording is clean without any breakups or dropouts, useful for your secondary market after the live event. The Teredek Bond we use has six cellular modems on-board; you generally get them from two different providers, so, if one loses bandwidth, the other network still covers you. It’s sending h.265 so even if you’re down to one modem card, you can still get your signals thru. We use this as a poor man’s satellite truck in the field, almost every day. You may be able to rent a bonded cellular solution.
Regarding wireless cams on a super-low budget, you guys might not be aware of how much development has progressed in the RC drone/airplane hobby… they are getting very impressive ranges on their incredibly tiny 2.5 gig wireless cameras, used for first-person-view model flying while wearing goggles like the Fat Shark and others. These systems are modular and can be obtained with just the transmitter and receiver, or a TX with built-in camera, the cameras can be fixed or gimbaled. Price-wise I believe they are much lower cost than the Trango and other brands we’d normally use for broadcast quality capture and transmission. The systems are in the hundred-dollar and up range, instead of thousands, and I’ve seen ranges quoted at as much as 5 KM, though propagation at altitude is often easier than along the ground.
-
OK, I have done this pretty much weekly for three decades, for news events and conventions, training seminars, etc… And can tell you there are a LOT of ways to get this done. You don’t mic the speaker cabinet except as a last resort or backup, because that’s generally the worst audio, after relying on a distant shotgun. Don’t be that guy, because people will forgive sloppy video as long as the audio is clean, but never the reverse. The first thing to go for is to get an independent mic on the lectern, just to grab the speaker’s voice for your feed, and/or, you tap into the same mic being used to feed that PA.
How do you do that? If the PA mic is hard-wired, you could use a y-connector cable at the mic, and split off your own cable to your camera. The PA operator may not allow that, because it weakens his incoming signal, and also, you never do that without first asking their permission. Throw your own mic and table stand up there. If they don’t allow your stand, you could try a tiny hardwired lav mic clipped to their existing stand, or anywhere on the lectern, really, because lavs are omni-directional. In addition to stick and lav mics I also carry a shotgun mic and a PZM boundary mic which is very flat and can be hidden anywhere on a flat surface using gaffer tape. If the camera position is within about 15 feet or less of the speaker, a high-end shotgun *might* work… but only if the speaker stands very still the entire time.
Or better, go to the mixing board for that PA system, and bring an adapter for all the common types of available connection: an XLR, a Quarter-Phone, Mini/headphone, an RCA, even. You can get these adapters cheap at Markertek or Monoprice as well as Amazon. Me, I still own a tacklebox full of them from Radio Shack 🙂 Never count on the board operator to have these – it is your responsibility to be prepared and equipped. For anything!
It helps to also own a line-to-mic transformer, adjustable impedance pad, or attenuator, like the Shure A 15 AS. A very solid toy that I’ve used for years. Lets you drop a too-hot signal down to where it works with your camera’s mic-input. Just Plain Works. Bring your little bag of adapters to the PA system operator or DJ mixer person, greet them with a greeting of Hello, Brother! …and politely ask to tap in, however they can do it. They will either have a “line-level” or “mic-level” output available off the board. Be sure to ask which it is. If the sound you get is blowing out too loud and distorted, chances are you have a line-level signal going into your mic-level impedance camera input. Some cameras have a mic/line selector switch, use this to help fix the issue. In some cameras it isn’t a physical switch but a menu setting. Or get the Shure A-15 and interpose that in the signal chain and drop the level before it gets to your camera. Some audio boards, the operator can trim the output level too, ask for that if it’s too hot. Obviously you want to get to the venue early for doing all this and testing it.
At bigger events, with live board operators, look for/ask for an audio “mult box”, also known as an audio distribution amplifier. This is the audio equivalent of a multiple-outlet AC power strip, but for audio. Many camera operators can tap in to one feed this way, and it’s a preferred way, common at news events. Some DJ’s or PA operators will instead offer a “DI” – that’s a “Direct Box”; again, these can be used to change the signal level to what you need.
What if the mic being used is a wireless hand-held or lav?
Nothing says you can’t bring your -own- wireless lav, on another channel, to add to the one being worn. Unless the venue says no to that. Then you’re back to tapping into the audio board output, or adding a y-splitter to the output of their wireless receiver system. If you own a wireless system compatible with the venue, you might just ask the receiver frequency and tune yours to match it. As an aside, some churches have a wireless sound system used by the hard-of-hearing, with little pocket receivers they loan out; you add your own earbuds… well, these can also feed a camera, if you have the right adapters, and it should be a pretty clean feed. Did that for weddings for years.
Now, a trend I’ve come across mostly at hotels and banquet halls is, they are too cheap to use audio staff, or have had too many unskilled users mess audio things up over the years, and so have “simplified” their audio system for a room to the point where you have *nothing * to tap into – it’s a sealed system in a box or room you can’t access, and the only accessible controls are an on/off and volume control, if that. Or, the event is using a very small-scale self-contained PA system, again, with no output jack on it that you can tap. Then you might have to mic a speaker grille or cabinet – if you can reach those. But there is one other thing you can try first that’s still better. Have a small audio recorder, or use your iPhone set on the free audio recording function, set that on the lectern with some gaff tape to keep it from sliding, and just let it roll continually the entire event. Bring that back to the edit bay: both FCPX and Premiere Pro (and probably Resolve) can automatically synch up this closer audio with whatever wild sound you got from the actual camera position. I find iPhones are pretty phenomenal for this, even ones that are not active as a phone any more still make great audio recorders and cameras – cheap at pawn shops. I own an older audio recorder, a Tascam DR05, works terrific for this as well, and cheap off ebay.
Congratulations for reading this far. You’re here because you tried every previous trick I listed above, and you’re still… stuck, Okay, reluctantly, this is how to mic the speaker cabs, damnit.
Check the back of the speaker: some have an “out” or “through” connector, meant for chaining to more speakers. It might be possible to tap into that with an adapter. If the speakers are connected with a pair of twisted wires and spring connectors, and you have an adapter with matching bare wires, or alligator clips, you could try to add yours to theirs, but you’ll need a line -to-mic transformer or a “pad” to bring the level down to camera mic level. But that will be way cleaner than picking up the cabinet acoustically, with all the other room noise. I hope you see how important it is to have a huge collection of various audio adaptors if you take your work seriously. You need not buy them all at once, but keep adding to the kit as you go. It pays off.
Last chance; mic the front of the speaker cabinet (sighs) Okay…
The type of mic is important; you need a dynamic mic, that is, one that doesn’t need external power to work. Classic dynamic “stick” mics include the Shure Sm57 or SM58, the ElectroVoice EV 635 series, or something like those, that will not be over-saturated by the loudness of the speaker. These have a cardioid or super-cardioid pickup pattern that is pretty directional, rejecting the crowd and venue noise around it. Get the mic up close to the grille of the speaker, without touching it. I tend not to point it right at the grille but rather at 45 to 90 degrees to it, pointed towards floor or ceiling, you’re playing *across* it, not directly into it. Why? Plosives: the B and P sounds that will pop too hard. And I listen to hear if there is any buzzing getting picked up, then back off a little. If you look at how some bands mic their guitar amps, they sometimes hang the mic down by its cord with some gaffer tape to dangle in front of the speaker cone at 90 degrees relative to the cone.
If the room you’re in has ceiling-mounted, down-facing speakers only, (conference rooms and banquet halls with sealed, “hands-off” PA systems often do this) I was able to handle that with a shotgun mic, gaff-taped to a telescoping 8-foot light stand, and then elevated straight up at the ceiling speaker, in a back corner of the banquet hall, so the final mic-to-speaker distance was only 2-3 feet… The shotgun rejects all noise from the sides, and only grabs what is directly ahead of it. Good shotguns cost a lot. Worth it. The mid to lower level cost shotguns like the Rode are popular. But if you’re working on a lower resource scale than that, I had good luck with a Takstar mini shotgun off Amazon.
There you go. That is every trick in my audio capture book. Pass it on. And let me know how you did!
-
before you find your zoom guru, you might benefit from the more systematic trainings offered by Larry Jordan and Ripple training, etc.