
Tomas Alfredson’s Playbook for Cloud Collaboration with DaVinci Resolve Studio
How the production team on “Alfie Atkins” kept edit, color and VFX moving on a budget.
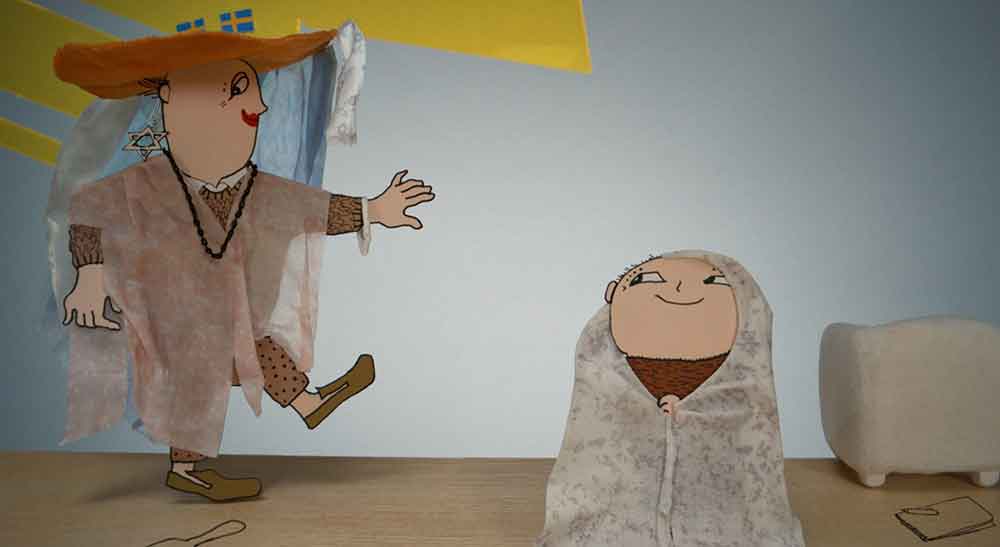
Tomas Alfredson’s route to “Bara knyt, Alfons!” (“Alfie Atkins”) started in the cutting room. The editor, who became the director of “Tinker Tailor Soldier Spy,” has always liked keeping decisions close to the work. When adapting the beloved Swedish literary character “Alfie Atkins” to a series of films, he wanted the same intimacy the books have with their readers. “I am too old to have read these stories as a child, but I have three children who’ve all grown up with them,” he said. “You quickly notice that the kids really engage with the story and characters.”
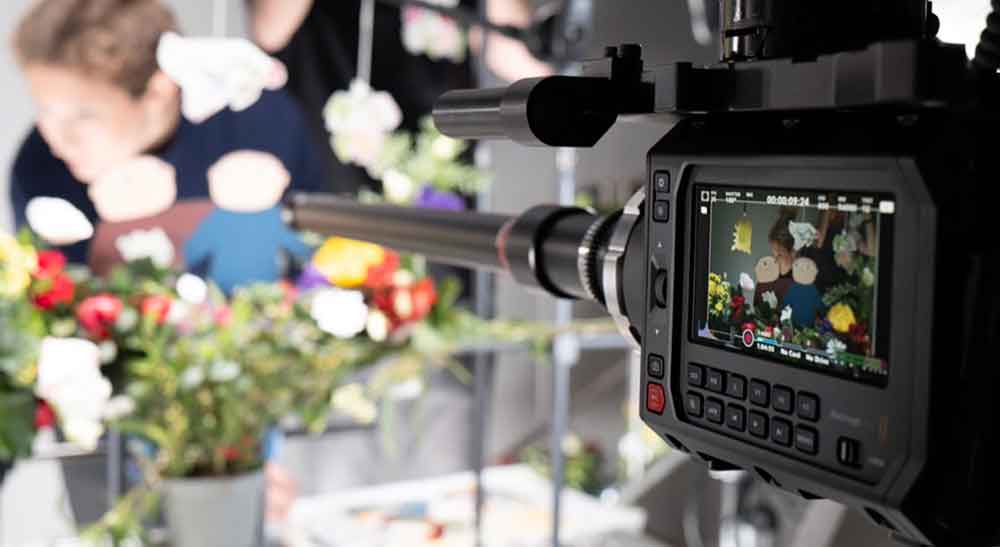
In 2022, Alfredson built the first series to respect that feeling, relying on a small crew and miniature sets, a Blackmagic Pocket Cinema Camera 6K digital film camera for capture, and Blackmagic RAW for both acquisition and post. Rushes moved straight from SSD into DaVinci Resolve Studio, and the material was shaped as three 30 minute films before being cut into ten 12 minute episodes. It was a practical approach that stayed faithful to author Gunilla Bergström’s illustrations.

Series two retained the same approach and look but rethought how the team worked together. Having started his career as an editor, Alfredson has always preferred simplicity in his production workflow and was intrigued by the idea of collaborating with the help of Blackmagic Cloud.
As with series one, Alfredson used one codec for both acquisition and post, opting to shoot with the Blackmagic PYXIS 6K digital film camera and brought edit, color and VFX into DaVinci Resolve Studio and Blackmagic Cloud. What follows are some practical tips from Alfredson that served the production team well, with advice on how to get the most out of collaborating in DaVinci Resolve Studio.
Was the intention to keep everything inside the Blackmagic Design ecosystem?
Absolutely. From the beginning, the goal of the first series was to see if we could create something entirely within the Blackmagic world, and we did, except for sound. The sound team used their preferred software, but everything else stayed within Blackmagic. We shot directly onto SSDs, moved those drives straight into the edit, and kept everything in DaVinci Resolve Studio. No exporting, no transcoding, no bouncing between programs. Keeping everything tightly within the ecosystem worked incredibly well.
What connected departments on the technical side?
We used three Blackmagic Cloud Store Mini 8TBs as local storage, with the main one dedicated to editing and the XX used by the VFX team. The colorist and post house then connected via Blackmagic Cloud, allowing everyone to essentially work simultaneously with shared updates. As post production progressed, we continued to streamline the shared projects into lighter versions with fewer media files, while always retaining access to earlier project versions and all source material if needed.
How did Blackmagic Cloud change the way you worked?
The Blackmagic Cloud system gave us a lot of flexibility. Since it was a small, low budget production, our post house could pick up the project whenever they had a spare hour, even if we hadn’t reached picture lock. They could update color, review effects and make changes directly in the timeline. Traditionally, you can only start color grading once everything is finalized, but this time, we could grade in parallel. When you see something on a large grading monitor that doesn’t look right (maybe an effect or a small artifact), you can open the VFX shot right then, make corrections, and see the result immediately. In a traditional workflow, that would take weeks, passing files between vendors. This gave us real freedom and the security of knowing we could always go back into any clip and make adjustments at any stage.
How did reviews and collaboration work day to day?
Overall, it worked beautifully. We had three different VFX artists working in three different places, delivering directly into the same project. It was quite revolutionary, both technically and philosophically. Even without a big studio pipeline, the ability to share live project versions was invaluable. We could call the post house or a VFX artist and say, “Check the new version,” and within minutes, they could view and respond. It was a much more fluid and connected process.
Did Blackmagic Cloud improve rendering and file exchange, and what discipline is required?
Generally, yes, it was reliable, though discipline is always essential. You must stay organized, putting files in the correct folders and naming things correctly. When you are in a hurry, it is easy to lose track.
What changed in the edit and grading rooms?
A standout update in DaVinci Resolve Studio’s version 20 is that our colorist could access all the layers in a sequence, sometimes 20 or more, and isolate individual layers to grade. That is an amazing development. It can be technical, but it gives far more control and creative freedom.
The new trackers and features in the Fusion page are much improved, and DaVinci Resolve Studio 20 introduced major updates to the keyframe editor. It feels far more stable and intuitive. We started the project on version 19, and the reliability improvement has been significant.
Why choose PYXIS 6K for capture, and how did it help with the miniature work?
We used a Blackmagic PYXIS 6K as our primary camera. It worked perfectly with our motion control rig and Laowa probe lenses. These lenses could pass through tiny openings in our miniature sets, which was crucial since we shot in a model world. The PYXIS 6K was incredibly reliable, robust and professional. Compared to the Pocket Cinema Camera 6K we used before, it is night and day in terms of build and ergonomics.
We also upgraded our motion control system, and it is much more sophisticated now. This is a film for young children, so they might not be able to describe the difference, but they can feel it. Everything feels smoother and more alive; the whole production feels better in every way.
Can you share an example of a time when this new collaborative process changed the creative outcome?
When you are editing, timing is everything. It is hard to judge pacing when you are working with unfinished material, green screens, missing effects and no music. With this setup, we can generate quick composites to feel the rhythm of a scene. That is invaluable. It means you can adjust emotional timing while you are still shaping the story without blowing the budget. We can even show what the raw shot looks like and then the final to illustrate the difference.
What is the biggest benefit of Blackmagic Cloud?
The most significant benefit is creative freedom. Knowing you can make changes at any point is powerful. You are no longer boxed in by technical constraints. Traditionally, editing and effects happen in strict stages, like building a house where you do the foundation, then plumbing, then the roof. Now, with Blackmagic Cloud, you could almost begin with the roof if you wanted to. You can edit, grade and composite simultaneously. It is creator friendly, and it saves both time and money.
What would you say to filmmakers who are hesitant about the cloud?
Many decision makers in film are conservative. This technology is not just about saving money. It not only improves quality but also makes the process more human. It gives you the freedom to create, iterate and collaborate all at once. My advice is to be open minded, get a few key people on board and commit. If you embrace it fully, it is transformative.
Enjoying the news? Sign up for the Creative COW Newsletter!
Sign up for the Creative COW newsletter and get weekly updates on industry news, forum highlights, jobs, inspirational tutorials, tips, burning questions, and more! Receive bulletins from the largest, longest-running community dedicated to supporting professionals working in film, video, and audio.
Enter your email address, and your first and last name below!


Responses