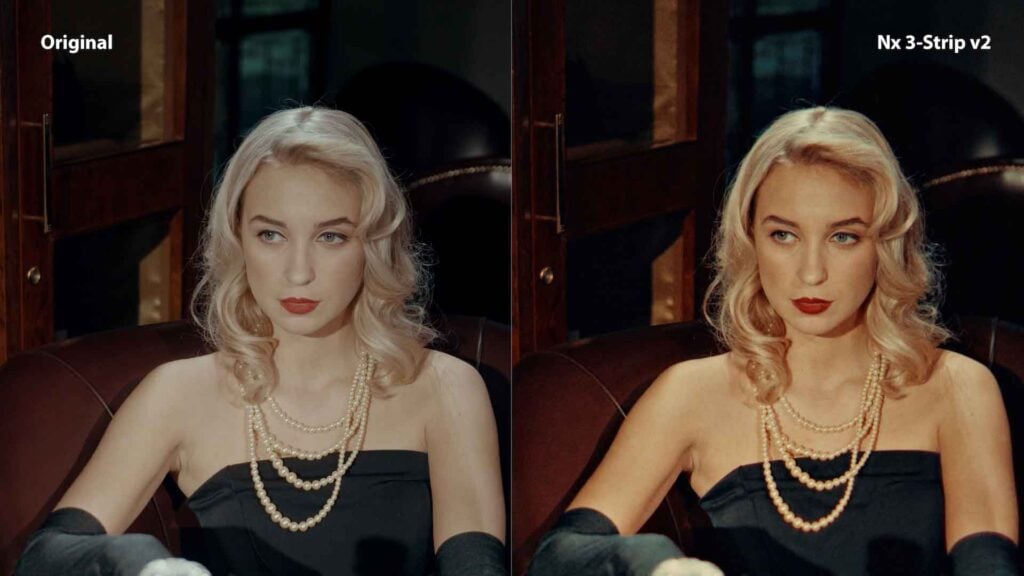
Introducing Nx 3-Strip v2 — A Physics-Based Technicolor Reconstruction for DaVinci Resolve
I’ve been working on a DCTL for Resolve that tries to rebuild the Technicolor three-strip process from the ground up, instead of approximating it with LUTs.
Version 2 just shipped, and it’s a pretty big step up from the first release.
Why I Built This
Most Technicolor emulations start from a scanned print and work backwards. You sample the look, build a transform, and get something that feels close at first glance.
But it breaks pretty quickly once you start pushing the image.
The original look wasn’t a grade. It came from how the process behaved. Dye transfer, gelatin absorption, printing order. All of that interacts in ways a simple mapping can’t really describe.
So I went the other direction and tried to build it forward from the process itself.
What It’s Doing Under the Hood
The DCTL runs the image through a pipeline that mirrors the original system:
- Spectral separation to get away from broad digital primaries
- Optical characteristics of the three-strip camera (focus differences, fringing, alignment)
- Bipack negative behavior, including channel-dependent softness and halation
- Sequential dye transfer (cyan → magenta → yellow), where later layers interact with already-saturated gelatin
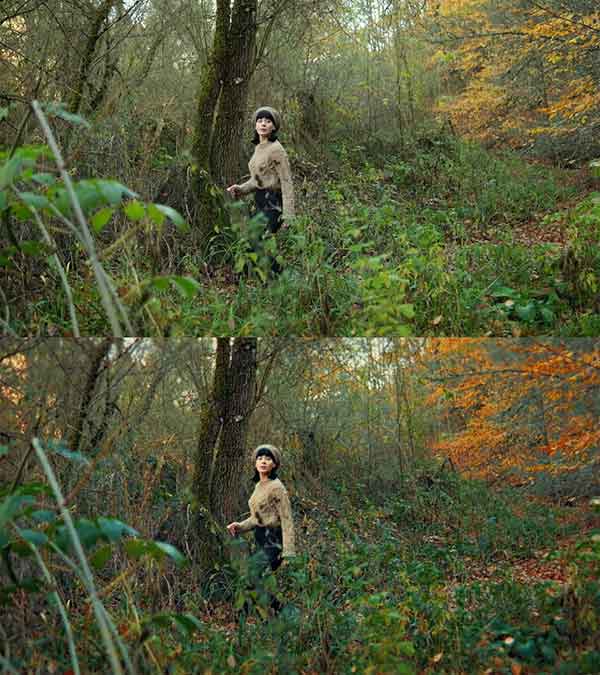
- Subtractive color behavior, where saturation increases density instead of brightness
The goal wasn’t to match a reference frame. It was to get the same kind of behavior so the image holds up when you push it.
Grain (this was a big one)
Real IB prints don’t have silver grain. It’s just dye on gelatin.
Most film grain models don’t translate well because of that. They sit on top of the image instead of feeling embedded in it.
This version uses a dye-based model instead, so the texture follows density rather than acting like noise.
What’s New in v2
- Support for a wide range of camera formats (LogC3/4, S-Log3, RED, C-Log2, V-Log, etc.) with internal gamut handling
- New acutance stage before dye processing, which helps with depth and separation
- Updated dye model with density coupling (more saturation = more density, not more brightness)
- Reworked grain system with softer, more integrated structure
- Roughly 5× faster at 4K
Can’t see this video? Click here!
Controls
There are a lot of them.
Everything is exposed, but the default is meant to be usable as-is. The controls are there if you want to dig into specific parts of the pipeline rather than treat it like a single look.
There are also diagnostic views for inspecting different stages, similar to how you’d evaluate an actual print pipeline.
Try It
There’s a free demo with a watermark if you want to test it on your own footage:
Runs in Resolve Studio (macOS, Windows, Linux).
Enjoying the news? Sign up for the Creative COW Newsletter!
Sign up for the Creative COW newsletter and get weekly updates on industry news, forum highlights, jobs, inspirational tutorials, tips, burning questions, and more! Receive bulletins from the largest, longest-running community dedicated to supporting professionals working in film, video, and audio.
Enter your email address, and your first and last name below!


Responses