
Working with Assets in Cinema 4D
As an industrial designer and 3D artist, I use many different 3D tools and often a combination of software to get the desired result. While for more industrial/engineering projects, I’ve preferred for years other tools more designed for these purposes, when it comes to more artistic designs, visualizations, or animations, my choice is Cinema 4D. I like Cinema 4D this much because it’s equipped with a deep set of modifiers, deformers, tools, sculpting tools, plugins, etc, that can really bring my designs to the next level.
With C4d, I can choose from a list of primitive shapes such as cube, sphere, cylinder, and so on, manipulate the settings to define the desired proportions and then combine these shapes to create more complex results. I can also start from 2D sketches designed directly into Cinema 4D or import them. I can make different shapes by using common 3d modeling operations such as loft, sweep and extrusions.


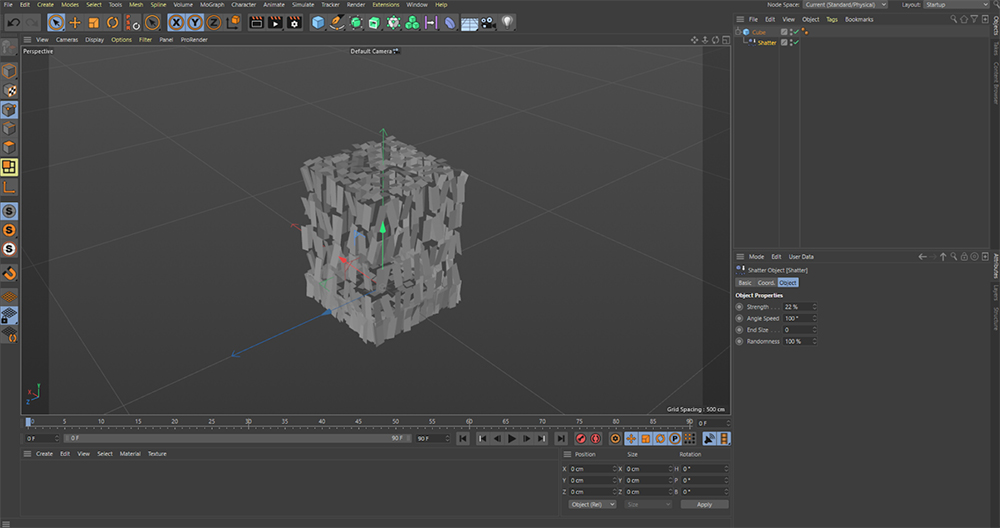
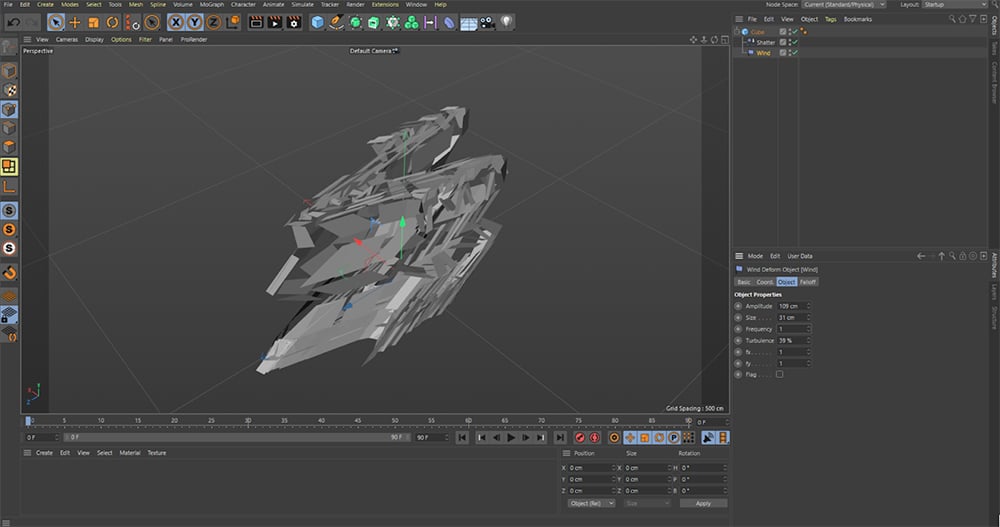
I have access to various deformer tools that can increase my designs’ complexity to help me achieve my intended result. I can go from the simplest ones like bend, shear, taper, and bevel that can parametrically alter the shape and detail of a model to the more effect-driven ones like wind, scatter, jiggle, melt, and much more. These deformers can be used to define a design better, bring it to life by animating parameters, or give objects a personality. Each deformer has settings that can be changed and keyframed anytime during the creation process.

Deformers can also be combined to create even more complex results. Since their settings still exist individually, they can be adjusted and tweaked at the end to get a more accurate design and be animated independently.
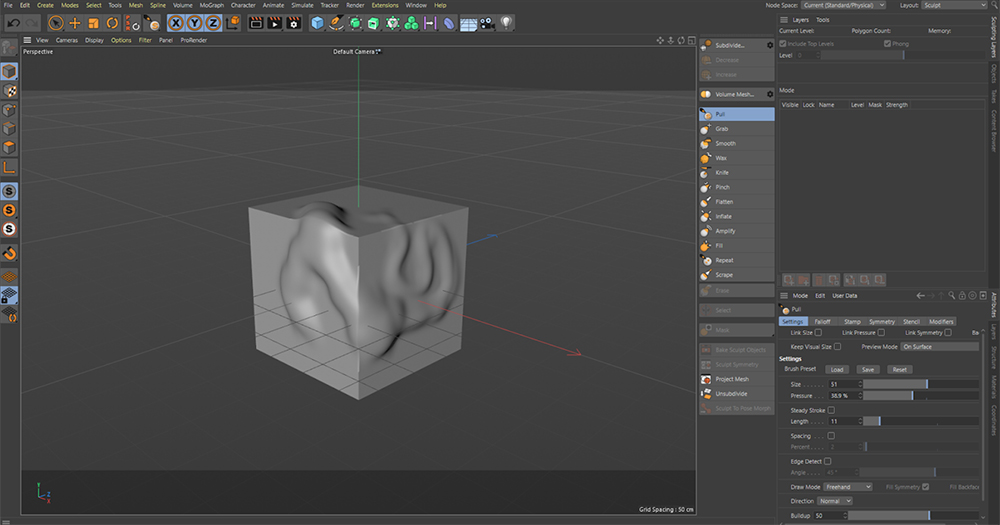
I prefer to work in a parametric system and always have access to the control settings to adjust each detail of the base model and the deformers/effects. If the scene has many elements, I like to have a global view of the composition and be able to make the necessary edits to achieve the result I have in mind. In many cases, we 3d artists find ourselves working with pre-made meshes, often in the form of downloaded 3d models, to complete our composition, and we need to make some adjustments to these meshes. Cinema 4D comes to our help with different tools that allow us to select and manipulate various mesh elements. We can deform the shape by selecting points, edges, or faces, moving them according to our needs. I like using Cinema 4d’s sculpt tools for more organic and free-form edits. The sculpting toolset offers a selection of brushes similar to Zbrush or other programs with 3d sculpting capability. It allows us to play with the 3D model as if we were sculpting clay.
I have the most fun when I can simulate real-world randomness and repetition. Let’s say I want to include a jar full of candies in my scene. Without the help of the cloner tool, the random tool, and the rigid body, it would take me forever to create all the elements, and the result would still not be very natural. In C4D, with a simple combination of deformers and modifiers, I can achieve a natural and realistic result within minutes, increasing subtle changes in detail that significantly affect the quality of our scenes.


Combining modifiers, deformers, and even forces present in the simulation tab of the Cinema 4D interface, we can achieve incredibly creative and realistic results, simulating physical forces applied to elements in our scene and animating them if we want. The forces behave as forces in the real world with strength, acceleration, turbulence, frequency, and other parameters that we can manage and adjust in the settings panel. The forces are actual simulations that happen over a set amount of time, so it’s good to have some extra frames in your timeline that act as a margin. When the simulation starts, the forces will affect the objects they were applied to, and sometimes the randomness of the simulation produces the most exciting results. We can now either keep the entire animation if that was the project’s scope or pick the frame where the effects look the most interesting and use it to create our final rendering.
Below is an image of a project I worked on in the past. Thanks to C4D modifiers and forces, I’ve been able to create a galaxy generated from the top of this conceptual ring made entirely in diamond.


The already huge potential that Cinema 4D has is increased even more thanks to the plugins that are great at achieving specific results and raising the quality of a project’s final result even further.
One of the most famous plugins for C4d is X-Particles which consists of tools that allow the user to replicate the dynamic behaviors of Cloth, Smoke, Fire, Fluids, Grains. X-Particles can be used creatively for more abstract simulations that lend themselves to a design.

Here are some other celebrated plugins, to name a few:
City Kit– for creating custom 3D architecture and cities.
Divider– a fragmentation plugin that helps the user create stunning procedural subdivisions.
Trypogen– combines mathematical processes with random and organic shapes for incredibly futuristic results.
Forester creates procedural vegetation with a wide variety of trees, plants, and grass.
These plugins are often used in animation projects and complement the assets that serve as the main subject. If you intend to work with animation or need to speed up your rendering process to meet a deadline, online render farms can make even the most ambitious visions feasible. GarageFarm.NET has deep support for Cinema 4d and a team of experienced 3d specialists available to help you get your renders on time and without problems.
Besides having all the features essential to creating and editing 3d assets, Cinema 4d’s tools are great for parametrically altering shapes and forms to add a creative flair to your work and achieve surprising results. Best of luck, and happy creating!
###
Enjoying this guide? Sign up for the Creative COW Newsletter!
Sign up for the Creative COW newsletter and get weekly updates on industry news, forum highlights, jobs, inspirational tutorials, tips, burning questions, and more! Receive bulletins from the largest, longest-running community dedicated to supporting professionals working in film, video, and audio.
Enter your email address, a first and last name, and let us know what you’d like to see more of in the message!

Responses