Creative Communities of the World Forums

The peer to peer support community for media production professionals.

Activity Forums VEGAS Pro Sony Vegas Pro Replace Background

  • Sony Vegas Pro Replace Background

    Posted by Robert Engle on December 30, 2022 at 8:48 pm

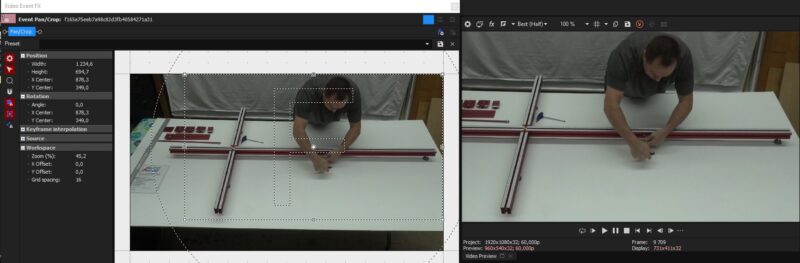
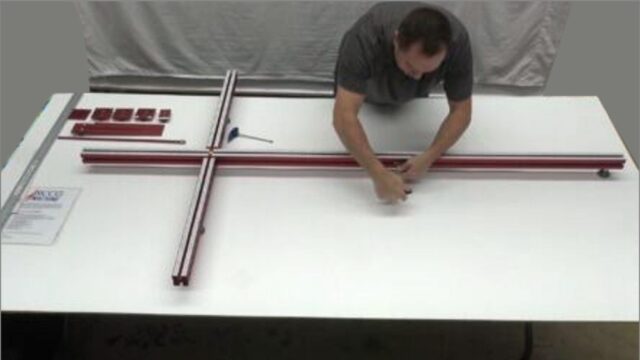
    I know this may be a basic question for you experts, but I am a super amateur. I videotaped a friend of mine talking about a product that he is making or should I say inventing. The only thing we had to put behind him was a white sheet so that’s what we did. Also, the lens had to be far back enough. On the left and right side of the video you see some stuff that I don’t want in the video. Because it’s a video can I replace that white sheet background and paint or get rid of the sides of the video of stuff I don’t want in it?

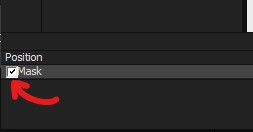
    I added a picture of the video clip hopefully it comes through. You can see on the sides of the video mas well as the bottom don’t want those things as well as change the background??

    Please help!!!

    Bruce Brent
    replied 1 month ago
    5 Members · 7 Replies
  • 7 Replies
  • Aivis Zons

    January 2, 2023 at 12:12 am

    Assuming that this is a static shot, you could mostly get by with only masks, cropping & zooming. However, removing the background behind a moving person in this case will be quite hard. As far as I know Vegas Pro doesn’t have any native tools that could easily try to remove such a background. If it was a well lit green/blue screen – that would be more doable with Chroma Keying. In your case you’d have to look for some other tools that could remove/replace the background, but even those will not do a perfect job, as this is not the best case setup.

    So I suggest you first pan/crop the area you want to be shown. Then if there’s something within the new framing that you want to hide or blur, you can duplicate the whole footage to another track and add a blur or pixelization effect to it. To contain the effect to a specific area you need to open pan/crop for the footage in the top track and enable “Mask”, then you use the masking tools to create an area where this blurred track will be visible. If you have already cut your footage, you can right click, copy, paste event attributes to the rest of the clips to save time.

    Attached 2 images – one of a simple zoom and pan, one with a selectively blurred background. Personally I think that if you were to go with similar framing as in my examples, you don’t even need to add that extra blur as there aren’t any particularly eye-drawing features there that would distract from your main subject.

  • Greg Wedgwood

    April 23, 2023 at 1:15 am

    Hey man, I’ve been having some really annoying issues with my masking, and I’ve had to do everything in photoshop. My masks aren’t showing up on my footage, and I’ve tried going through pretty much all my settings. Help would be amazing if you know what’s up.

  • Aivis Zons

    April 23, 2023 at 10:46 am

    Hey Greg, the solution here might be surprisingly simple – you haven’t enabled your Mask.

    To the left of your keyframes, under “Position” – you need to tick the box next to “Mask” for it to be enabled.

  • Greg Wedgwood

    April 24, 2023 at 8:05 am

    Dude I am such a simpleton HAHA. Thanks man, that has literally stopped me from using that tool for years now, that’s so embarrassing.

  • Brie Clayton

    April 25, 2023 at 3:10 pm

    Thank you, Aivis!

  • Bruce Brent

    May 4, 2023 at 2:59 pm

    Robert, hopefully, your camera is on a tripod, which makes this change much easier.

    Here’s what you want (below). The tutorial is here…. https://www.youtube.com/watch?v=efV4P3qBI5M

    Some contents or functionalities here are not available due to your cookie preferences!

    This happens because the functionality/content marked as “Google Youtube” uses cookies that you choosed to keep disabled. In order to view this content or use this functionality, please enable cookies: click here to open your cookie preferences.

  • Bruce Brent

    May 4, 2023 at 3:19 pm

    Robert, as an after-thought, I am guessing this is your first venture in this type of project. With that in mind, here’s some info to help….your project (video) should be on the first track. On the second track will be a solid color background which you can find on the “generated media” tab. Choose any color because you’ll use the eyedropper to change to your project’s sheet that’s hanging behind your talent. Try to get as close to the edge of the sheet where the color is smooth without the creases or dark spots.

We use anonymous cookies to give you the best experience we can.
Our Privacy policy | GDPR Policy